Preventing Callbacks and Warranty Claims with Kitchen and Bath Refinishing That Lasts
Why does my bathtub refinishing look smooth before spraying but uneven after the topcoat?
Topcoat reveals surface variations that are invisible on a bare substrate or even on primer. The gloss of a topcoat acts like a mirror — it reflects light uniformly from a truly flat surface, and reflects it inconsistently from surfaces that have subtle waves, ridges, or transitions. What felt smooth under your fingertip and looked acceptable under normal lighting shows up clearly in the high-gloss reflection of the finished coat. The solution is raking light inspection before primer and again after primer, which catches these variations before the topcoat commits them to the finished surface.
What causes waves or ripples in a refinished bathtub surface?
Ventilation & Containment Systems
How do professional refinishers identify high spots and low spots before coating?
What gun cleaning solutions protect seals?
Professional HVLP spray systems with appropriate nozzle sizes can atomize thicker refinishing coatings effectively.
How do I prevent coating buildup in tight corners and radius areas?
Not all cleaning solutions are safe for spray gun components.
Choose cleaning solutions that:
- Do not degrade seals
- Do not corrode internal passages
- Remove coating residue effectively
- Use nylon brushes and Zen-Strip Liquid for monthly thorough cleanings.
Regular maintenance prevents costly equipment replacement.
Yes. Areas where coating is significantly thicker than spec take longer to cure and may never reach full crosslink density in cold or humid conditions — the coating chemistry is depth-limited in how far the cure initiates. Thick film buildup in corners and around drains is also associated with solvent entrapment — solvents trapped in a heavy film that hasn't fully cured remain in the coating and can cause adhesion problems or softness over time. Consistent film build within the product's specified range avoids both problems.
If the coating is still wet: work quickly and carefully to redistribute excess material with a foam roller or brush, moving it from the pooled area toward adjacent surfaces. This is a very narrow window — once the coating starts to set, touching it creates drag marks that are worse than the pool. If the coating has cured: wet sand the affected area at 400 grit to bring it back to the surrounding film level, then polish to restore gloss. If the buildup is significant — heavy sagging or runs — wet sanding may need to go to 220 or 320 to reduce the heavy area before finishing at 400 and polishing.
What's the best lighting for spotting surface imperfections before spraying?
A single portable work light positioned at a low angle to the surface — typically a task light or LED shop light set near floor level and aimed along the length of the tub or tile surface. The goal is raking light that grazes across the surface rather than overhead lighting that illuminates from above. Overhead lighting washes out surface variations; raking light reveals them by creating shadows and highlights at any change in profile. Carry a portable LED work light in your kit specifically for this purpose — natural light and bathroom ceiling fixtures don't provide the directional light needed for effective surface inspection.
What's the difference between a smooth finish and a properly leveled finish?
How do professional refinishers achieve a perfectly smooth bathtub finish?
Can surface imperfections be fixed after the topcoat is applied?
Every callback costs you money. Not just the time and materials for the return visit — there's the scheduling disruption, the client relationship damage, the online review that might follow, and the nagging question of what went wrong and whether it'll happen again on the next job. For a refinishing business running at volume, a callback rate of even a few percent can quietly erode margins that look healthy on paper.
The good news is that most callbacks in kitchen and bath refinishing are preventable. They trace back to a small number of identifiable causes — substrate misidentification, shortcuts in prep, wrong product for the surface, spray technique errors, or a client who put the tub back in service before the coating was ready. Fix those causes systematically, and callbacks become rare rather than routine.
This guide covers the full picture: substrate identification, product matching, prep sequence, spray technique, dry time management, client communication, and warranty structuring — everything a professional refinishing contractor needs to deliver work that holds up and clients who don't call back.
Start With the Substrate: Getting This Wrong Causes More Callbacks Than Anything Else
The single most preventable cause of coating failure in refinishing work is applying the wrong system to the wrong substrate. Bathroom fixtures come in cast iron, steel, fiberglass, acrylic, cultured marble, ceramic tile, and porcelain — and while they can look similar, they behave very differently under coating systems. Surface hardness, thermal expansion rate, porosity, and the chemical compatibility between the substrate and the coating's adhesion chemistry all vary significantly across these materials.
How to Identify What You're Working On
Misidentifying a substrate isn't just a beginner's mistake — bathrooms often have multiple fixture types in the same room, and in remodels or older homes, materials aren't always what they appear to be. Before you mix anything, know what you're coating.
Cast iron: Heavy and rigid. Tap it — it produces a dull, low resonance. Cast iron tubs are typically older units and are genuinely heavy to move. No flex whatsoever under pressure. Original surface is porcelain enamel fused to the iron.
Steel: Lighter than cast iron but still rigid. A tap produces a slightly higher, tinnier resonance. Stamped steel tubs were common in mid-century production housing. Like cast iron, the original surface is porcelain enamel.
Fiberglass: Lightweight, flexible — apply moderate pressure with a hand flat against the wall or floor and you'll feel it give slightly. Usually a single-piece unit. Surface is gel coat, which is a polyester resin layer that can be dull, oxidized, or cracked on older units.
Acrylic: Similar weight and flexibility to fiberglass but typically smoother and shinier. Acrylic has a distinctly warmer feel to the touch — it doesn't feel as cold as steel or porcelain. The surface is the acrylic itself, not a separate gel coat layer, which affects both prep and coating compatibility.
Cultured marble: Heavy but not as heavy as cast iron. Cold to the touch, typically with a gel coat surface similar to fiberglass. Often used for vanity tops and shower surrounds. The gel coat on cultured marble is generally thinner than fiberglass gel coat, making aggressive sanding a risk.
Ceramic tile and porcelain: Hard, cold, and rigid. Grout lines are the giveaway. Porcelain tile is denser and harder than ceramic — a surface hardness test (scratch test with a key) won't mark porcelain tile but will mark softer ceramic.
For a detailed substrate-by-substrate prep guide on acrylic and fiberglass, see Zen-Tek's post on
properly preparing acrylic showers and tubs for refinishing. Getting the substrate right before touching a product is the foundation everything else is built on.
Why Substrate Matters for Coating Selection
Cast iron and steel share a porcelain enamel surface — they're in the same category for coating purposes and respond well to epoxy-based primer systems and solvent-borne topcoats. The hardness and rigidity of the substrate means thermal movement is minimal and coating flexibility isn't a primary concern.
Fiberglass and acrylic are more challenging. Both expand and contract more significantly than metal substrates with temperature changes, and they flex under load — when someone steps into an acrylic tub, the floor panel deflects. Coating applied to acrylic without a primer system that accommodates this movement will crack or delaminate at stress points over time. Additionally, many solvents that are safe on porcelain enamel will attack acrylic directly — certain ketones and aromatic solvents soften acrylic surfaces, and a cleaning or prep product with the wrong chemistry can damage the substrate before you've even started.
Cultured marble presents its own considerations. The gel coat surface is similar to fiberglass in chemistry but is thinner and more variable in quality across manufacturers. It's also prone to chemical sensitivity — aggressive cleaning products that would be fine on porcelain can damage cultured marble's gel coat, and some solvent-based primers can attack the unsaturated polyester resin beneath the gel coat if the gel coat has any micro-cracks or surface voids.
The practical rule: identify the substrate, verify your product system is appropriate for that substrate, and don't assume that what works on one material automatically works on another.
Matching the Right Zen-Tek System to Each Surface
Zen-Tek's product line covers the full range of refinishing substrates, and matching the right system to the right surface is central to callbacks-free work.
For Solvent-Borne Applications on Hard Substrates
On porcelain enamel surfaces — cast iron, steel — and properly prepared fiberglass and tile, the core solvent-borne system starts with Prime-X, Zen-Tek's one-coat high-build epoxy primer. Prime-X is formulated to bond aggressively to hard, non-porous substrates after proper etching and prep. Its high-build capability means a single coat establishes an adhesion layer that sets up the topcoat for long-term performance. No runs, no sag, no multiple primer coats required on properly prepared surfaces.
For topcoat on hard substrates, Synergy — Zen-Tek's polyurethane acrylic topcoat — delivers the durability, gloss, and chemical resistance that kitchen and bath surfaces demand. Formulated to outperform conventional refinishing topcoats at a factory-direct price, Synergy is the go-to for standard residential and commercial refinishing work where solvent-borne systems are appropriate.
For iso-free applications — jobs in occupied buildings, healthcare facilities, or where isocyanate-free coatings are specified —
Zenix provides 92+ gloss and 4H pencil hardness in a non-isocyanate 2K system. Same application process, same adhesion requirements, different chemistry — and genuinely comparable performance to solvent-borne urethane systems.
For Water-Based Applications
When the job is in a school, hospital, occupied apartment, or any environment where VOC limits or odor restrictions apply, the water-based system is the right tool.
WTR-Prime, Zen-Tek's two-component water-based epoxy primer, is engineered for strong adhesion to fiberglass, acrylic, porcelain, ceramic, cast iron, and laminate without reducer and without the solvent odor that makes occupied-building work difficult. Pair it with
WTR-Tek, Zen-Tek's high-gloss water-based polyurethane topcoat, for a fully water-based refinishing system that delivers better gloss and durability than any other water-based product in the category.
For Surface Stripping When Required
When a previously refinished surface has failing or incompatible coating that needs to come off before new coating goes on,
Zen-Strip — Zen-Tek's automotive-grade chemical paint remover — handles urethane and epoxy coatings without damaging the substrate beneath. Applying new coating over a failing existing finish is one of the most reliable ways to generate a callback within the first year.
For Cabinets and Countertops
Kitchen cabinet and countertop refinishing requires a different product approach than tub and tile work.
Cabinext, Zen-Tek's skip-sand acrylic topcoat engineered specifically for cabinets and countertops, delivers hardness that exceeds automotive finishes without the sanding step that slows cabinet jobs down. It's the right product for the right surface — and using a tub and tile topcoat on cabinets, or vice versa, is a mismatch that creates performance problems.
Prep: The Non-Negotiable Foundation of Callback-Free Work
There is no spray technique, no premium topcoat, and no warranty language that compensates for inadequate surface preparation. Every peeling, cracking, or failing coating job that comes back as a callback — virtually without exception — has a prep failure at its root. Contamination that wasn't fully removed. A surface that wasn't profiled properly for primer adhesion. A repair that wasn't leveled before coating went on.
The Cleaning Sequence
Cleaning isn't just wiping down the surface before you start. In a bathroom that's been in regular use, the surface has accumulated soap scum, body oils, silicone from cleaning products and personal care items, and potentially wax or polish applied by the homeowner. Each of these is a potential adhesion failure waiting to happen.
The sequence matters:
- Silicone removal first. Silicone from caulk, shower sprays, and conditioners doesn't respond to standard degreasers. Use a dedicated silicone remover before any other cleaning step on surfaces that have been in regular use.
- Degrease thoroughly. A solvent-based degreaser addresses body oils, petroleum residues, and wax. Wipe in one direction — back-and-forth wiping redistributes contamination rather than removing it.
- Final solvent wipe. A clean cloth, a fresh pass, no bare hand contact after this point. Skin oils contaminate a surface immediately.
For the full cleaning and prep sequence for fiberglass, see Zen-Tek's post on
surface prep and coating steps for refinishing fiberglass tubs and showers. For the fisheye-specific consequences of contamination that made it to the coating stage, see the post on
what causes fisheyes and how to prevent them.
Surface Profiling
Primer needs mechanical adhesion — something to grip. On hard substrates like porcelain enamel, tile, and fiberglass gel coat, you create that profile through mechanical sanding (400 grit wet for fiberglass, appropriate grit for tile and porcelain) or through chemical etching with AdvanEtch, Zen-Tek's zero-VOC micro-etching sanding liquid that creates the adhesion profile without dust or aggressive acid exposure.
The choice between mechanical sanding and AdvanEtch comes down to the job environment — AdvanEtch is the better option in occupied spaces where dust is a problem, while sanding gives tactile confirmation that every area has been profiled. Either way, the result needs to be a uniformly dull, matte surface across the entire substrate before primer goes on. Glossy areas haven't been profiled and won't hold primer the way they should.
Repair Quality
Any chip, crack, or surface damage needs to be repaired and leveled before coating. A repair that telegraphs through the topcoat isn't just an aesthetic problem — it's a callback. The repair needs to be filled in thin layers (to minimize shrinkage), sanded level using a block that extends onto the surrounding substrate, and verified under raking light before primer goes on.
For detailed chip and scratch repair techniques across different substrates, Zen-Tek's post on
long-lasting tub and tile chip repair techniques covers the full repair process.
Spray Technique: Where Callbacks Get Created or Prevented
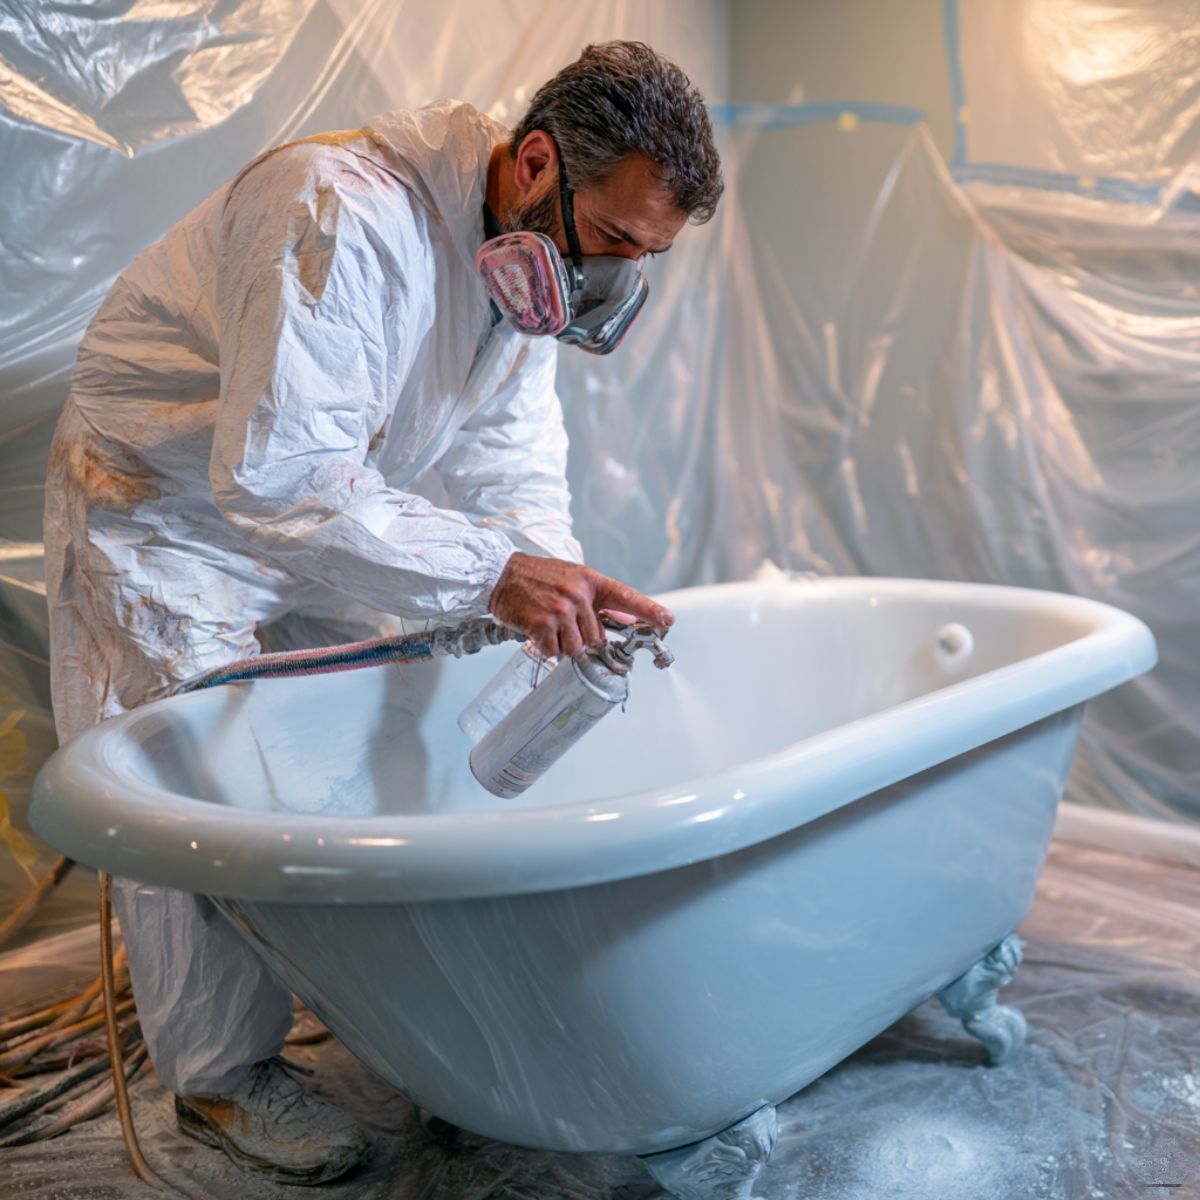
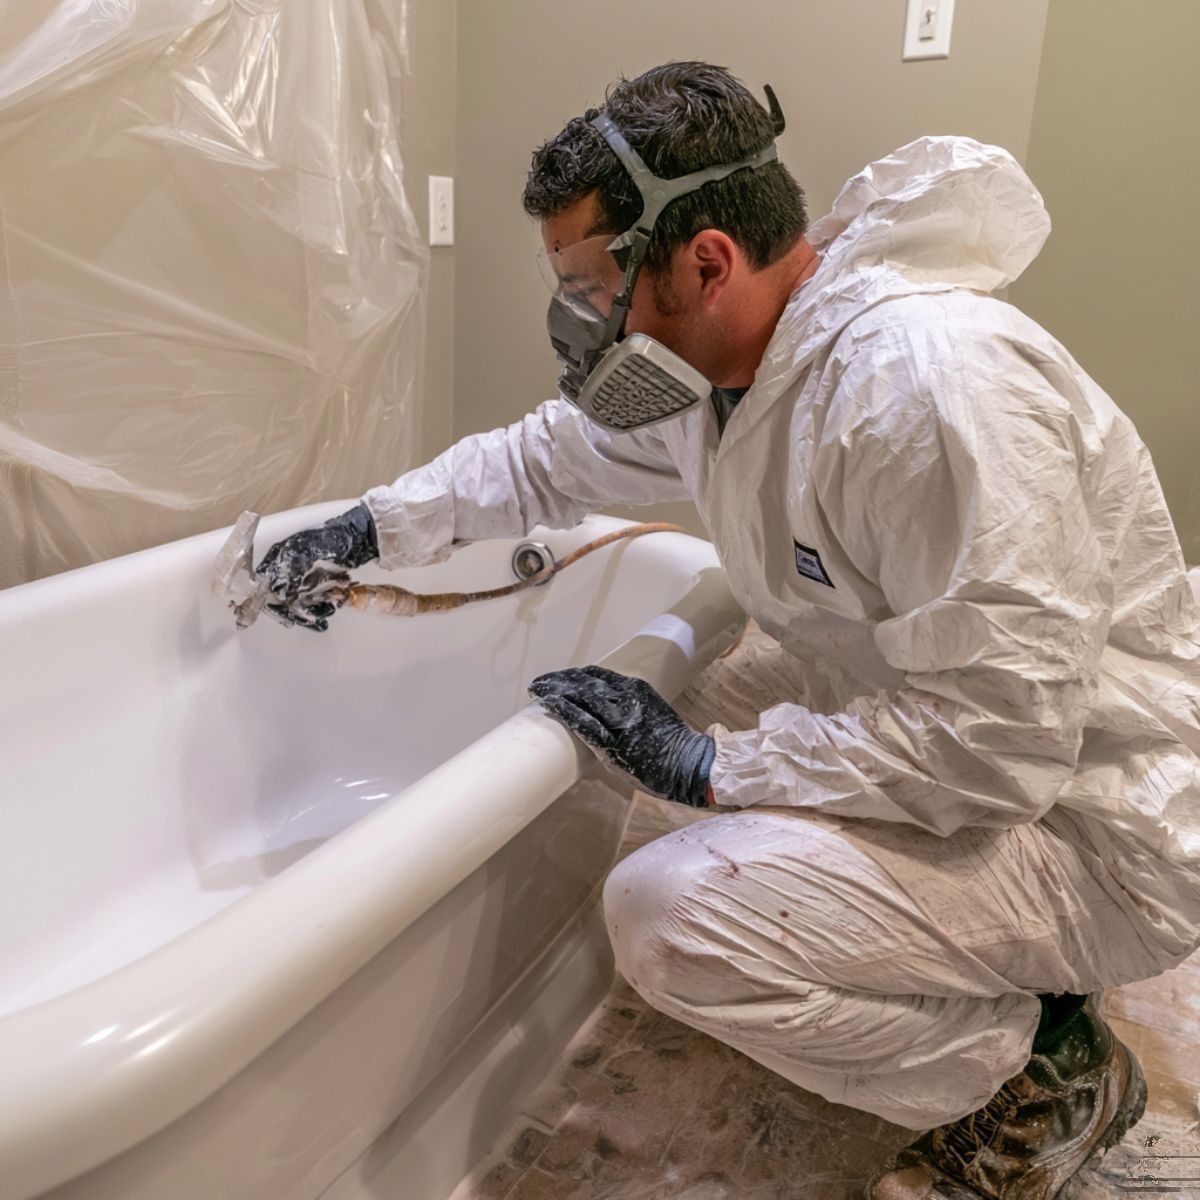
A properly prepped surface with the right primer can still produce a callback if the topcoat is applied with technique that creates runs, orange peel, fisheyes, or uneven film build. Spray technique is where experienced contractors do their best work — and where less experienced ones generate problems they have to come back to fix.
Equipment Setup
Wrong gun settings for the product and substrate create finish defects that are hard or impossible to fix without sanding and recoating. Before starting any job, confirm:
- Tip size: 1.3–1.4mm for most topcoats; 1.8–2.0mm for heavier primers
- Fluid pressure: Within the range specified for the product — too high creates dry spray and overspray; too low creates runs and poor atomization
- Fan pattern: Appropriate for the spray zone — tight in corners and on vertical surfaces; wider on open flat areas
- Gun-to-surface distance: 8–10 inches for most topcoat applications
The
Professional Refinisher's Equipment Cheatsheet on the Zen-Tek blog covers the full equipment setup reference — gun types, tip sizes, pressure settings, and the variables that affect coating performance.
Consistent Pass Speed and Distance
The most common spray technique error that creates callbacks is inconsistent speed and distance across a pass. Slowing down at the end of a pass, moving closer to the surface around a curve, or hesitating before triggering off all deposit more material in those areas. In a high-gloss topcoat, these inconsistencies read as gloss variation, sheen differences, and texture changes across the finished surface.
Commit to a speed and distance before you pull the trigger on the first pass. Practice the pass motion before triggering — particularly on curved geometry like fiberglass tub interiors where maintaining consistent distance requires active wrist and elbow adjustment as the surface curves.
Multiple Thin Coats Over One Heavy Coat
A single heavy pass that tries to build all the film thickness in one application is one of the most reliable ways to create runs, sag, pooling around drains, and buildup in corners — all of which are callbacks waiting to happen. Two to three lighter passes, each building appropriate film thickness, with correct dry time between them, produce better results than any single heavy application. The coating has time to level properly between passes, runs don't develop, and corners don't accumulate excess material.
For a thorough discussion of how pooling, runs, and uneven coating develop — and how to prevent them — see Zen-Tek's post on
seamless surface leveling for tub and tile repair jobs.
Orange Peel Prevention
Orange peel — the textured, citrus-skin surface that develops when coating flashes before it can level — is one of the most common spray defects that generates client complaints. It can be caused by pressure that's too high, gun-to-surface distance that's too far, application temperature that's too hot, insufficient reducer for the conditions, or airflow that's moving too aggressively across the spray zone.
Zen-Tek's detailed post on
what causes orange peel and how to prevent and fix
it covers every cause and corrective action in depth. Understanding orange peel — what drives it and how environmental conditions interact with spray technique — is worth studying for any contractor who wants to consistently deliver smooth, high-gloss finishes.
Ventilation During Application
Good ventilation during spray does double duty: it protects the health of the contractor and keeps the spray environment clean by moving atomized particles out of the space rather than letting them settle on the wet coating surface. Contamination particles settling on wet topcoat create texture that wasn't in the application — a finish that looked smooth coming off the gun but reveals debris under the gloss when dry.
For a comprehensive guide to ventilation setups in refinishing environments, see Zen-Tek's post on
ventilation setups for spraying and refinishing.
Dry Time Management: The Callback Source Nobody Talks About Enough
Dry time is where some of the most preventable callbacks originate — not because the coating system failed, but because the surface went back into use before it was ready, and the client blames the refinishing job rather than their own early use.
The Three Dry Time Windows That Matter
Understanding the difference between these three stages prevents both application problems and return-to-use problems:
Touch dry / tack-free: The coating surface is dry to the touch but far from cured. This is when tape can be removed and when you can assess the finish visually. It's not when the client can use the bathroom.
Recoat window: The previous coat is dry enough to accept the next coat without lifting or solvent popping, but hasn't fully crosslinked. Applying the next coat within this window allows proper intercoat adhesion. Applying it too early traps solvents; applying it too late may require light sanding to reopen the surface for adhesion.
Return to service / full cure: The coating has reached sufficient hardness for normal use — water exposure, cleaning products, and daily contact. This is the timeline the client needs to know and respect.
Dry times vary by product, temperature, and humidity — conditions that a contractor working in a real bathroom has less control over than a controlled factory environment. For the specific dry time windows for each Zen-Tek product across different environmental conditions, the dry times guide on the Zen-Tek blog is the definitive reference. When in doubt, extend the dry time rather than shortening it — a coating that was given an extra hour before service is ready to perform; one that wasn't given enough time may fail under the first cleaning.
Temperature and Humidity Impact
Cold temperatures slow cure significantly. Two-component coating systems — both epoxy primers and urethane or iso-free topcoats — are chemically reactive systems where the crosslinking rate is temperature dependent. Below 60°F, cure slows dramatically and full hardness may never develop in extreme cold. In an unheated bathroom in winter, this means extended cure times that need to be communicated to the client clearly.
High humidity introduces moisture into the coating system during both application and cure. On solvent-borne systems, this can cause blushing — a milky haze in the clear film that doesn't resolve on its own. On water-based systems, high humidity extends dry times significantly. The practical guidance: know the forecast and the building conditions before starting a job, and factor that into your timeline and client communication.
Client Communication: Preventing the Callback That Was Never About the Coating
A significant percentage of refinishing callbacks aren't caused by coating failure at all — they're caused by a client who used the bathroom too soon, cleaned the surface with an abrasive product, or simply didn't understand what "fully cured" means and what to expect in the first weeks after refinishing. These are preventable with clear, written communication at job completion.
The Return-to-Use Handoff
At every job completion, provide the client with written return-to-use instructions. Not verbal. Written. Verbal instructions that happened at the door during a rushed client conversation don't stick. Written instructions get referenced later when the client is wondering whether they can use the shower tonight.
Typical return-to-use guidance:
- 24 hours: No water contact
- 48–72 hours: Light use acceptable for most solvent-borne systems
- 5–7 days: Full cure before abrasive cleaners or scrubbing
- Cleaning guidance: Non-abrasive cleaners only; no Magic Eraser-style melamine foam; no bleach-heavy products directly on the freshly refinished surface in the first weeks
Explain the reasoning — a client who understands why the coating needs cure time is more likely to respect it than one who's just been told to wait.
Setting Expectations on Durability and Longevity
Professional refinishing done correctly lasts years under normal residential use. Clients who are told "this will last five to ten years with proper care" and then receive the care instructions have a benchmark. Clients who were told nothing, or who were given unrealistic promises, become complainers when the refinished surface shows any wear at all.
Be honest about what will and won't affect the coating. Hard impacts can chip any refinished surface. Bleach-heavy cleaners used daily will degrade any topcoat over time. Abrasive cleaners will scratch. Setting these expectations before the job protects your warranty against claims that are really about client misuse.
Warranty Structuring That Protects the Business While Building Client Trust
A warranty is a business tool as much as a client guarantee. A well-structured warranty signals confidence in your work, gives clients something concrete to point to when making a hiring decision, and protects you against claims that fall outside what your coating system can reasonably be expected to cover.
The key elements of a callbacks-resistant warranty:
Define what's covered. Coating adhesion failure and finish defects attributable to the application. Not impact damage, not cleaning product damage, not damage caused by use before the specified cure time.
Define what's not covered. Physical damage, chemical damage from non-recommended cleaners, normal wear in high-use commercial applications, damage caused by modification or repairs by others.
Specify the cure time period. The warranty period begins from full cure, not application date. This protects against claims in the first week when the coating is still developing hardness.
Document the job conditions. Note the substrate type, the product system used, and the environmental conditions at time of application. If a claim comes in, your records show what was done and under what conditions.
For a detailed guide to warranty structuring for professional refinishing operations, see Zen-Tek's post on
what bathroom refinishing warranty terms you should offer.
The Callback-Prevention Checklist
Before leaving every job, run through this sequence:
- Substrate confirmed and product system matched — not assumed
- Silicone removal, degreasing, and final wipe completed in correct sequence
- Surface profiled (sanding or AdvanEtch) uniformly across the entire substrate
- Repairs leveled and verified under raking light before primer
- Primer applied correctly and allowed proper dry time before topcoat
- Topcoat applied in multiple thin passes with consistent speed and distance
- No orange peel, fisheyes, runs, or pooling — inspect under raking light before tape comes off
- Written return-to-use instructions provided to client in hand
- Warranty documentation completed and left with client
- Job conditions noted in your records — substrate, products used, temperature, humidity
That sequence, executed consistently, is what separates a refinishing business that rarely gets callbacks from one that's constantly putting out fires.
Frequently Asked Questions About Callback Prevention and Substrate-Specific Refinishing
What bathtub and shower surfaces can actually be refinished instead of replaced?
Cast iron, steel, fiberglass, acrylic, cultured marble, ceramic tile, and porcelain are all refinishable with the right system and preparation. Each requires a substrate-appropriate primer and topcoat system — not all refinishing products work equally well across all these materials. The economics of refinishing versus replacement favor refinishing on virtually every substrate type when the structure of the fixture is sound, which is why substrate identification before product selection matters so much.
Which coating performs best on cast iron bathtubs?
Cast iron tubs have a porcelain enamel surface that's hard, dense, and chemically resistant — an excellent substrate for refinishing when properly prepared. Prime-X from Zen-Tek delivers the adhesion performance and build quality that porcelain enamel demands, and pairs with Synergy or Zenix topcoat for a durable, high-gloss finish. For cast iron that's been previously refinished, assess the condition of the existing coating before deciding whether to coat over it or strip with Zen-Strip and start fresh. Coating over a failing existing finish on cast iron is one of the more common sources of callbacks on older units.
Can the same coating system be used on cast iron, steel, acrylic, and cultured marble?
The same Zen-Tek primer and topcoat products can be used across these substrates, but the prep requirements differ enough that you can't treat them as the same job. Acrylic requires care with solvent contact during prep. Cultured marble's gel coat is thinner and more sensitive to aggressive sanding. Cast iron and steel take more aggressive prep without risk to the substrate. Same products, different protocols — and skipping the substrate-specific prep steps is where problems start.
Why do some coatings adhere well to porcelain but fail on acrylic surfaces?
Adhesion to porcelain enamel is primarily mechanical — the coating grips the etched or sanded surface profile. On acrylic, adhesion is both mechanical and chemical, and the chemical compatibility between the coating's solvents and the acrylic substrate matters significantly. Solvents that are inert on porcelain can soften acrylic, which disrupts the adhesion interface rather than supporting it. Additionally, acrylic flexes under load and expands and contracts more than porcelain with temperature changes — a coating without the right flexibility to accommodate that movement will delaminate at stress points regardless of how well it initially bonded.
What makes acrylic tubs more difficult to refinish than cast iron tubs?
Three factors: chemical sensitivity to certain solvents, greater thermal expansion and contraction than metal substrates, and flexibility under load. Acrylic substrates require careful product selection to avoid solvent attack during prep, coating systems with adequate flexibility to move with the substrate, and surface preparation that's thorough without being aggressive enough to damage the substrate. Cast iron is rigid, dimensionally stable, and chemically resistant — it's a more forgiving refinishing substrate in virtually every respect. Acrylic is where refinishing shortcuts most reliably create callbacks.
Do cultured marble shower surrounds require different primers than fiberglass or acrylic?
The primer chemistry requirements for cultured marble are similar to fiberglass — both have gel coat surfaces of unsaturated polyester resin chemistry. The difference is in the prep: cultured marble gel coat is typically thinner and more variable in quality, making aggressive sanding a risk and making chemical etching with AdvanEtch a preferred alternative in many cases. The primer system itself — Prime-X for solvent-borne, WTR-Prime for water-based — is appropriate for cultured marble with correctly executed prep. The main cultured marble-specific concern is identifying and addressing any micro-cracks or areas where the gel coat has been compromised, as these become paths for solvent penetration that can cause adhesion issues.
How can I identify whether a tub is cast iron, steel, fiberglass, or acrylic before refinishing?
Weight and rigidity are the primary diagnostic tools. Cast iron is very heavy and completely rigid. Steel is lighter but still rigid, with a slightly higher pitch when tapped. Fiberglass is lightweight and has a slight give under moderate hand pressure — you can feel it flex. Acrylic is also lightweight and flexible, and distinctly warmer to the touch than metal or porcelain surfaces. When in doubt, look at the underside of the tub if accessible — cast iron and steel have visible metal, while fiberglass and acrylic show composite or plastic material.
What happens if the wrong coating is applied to an acrylic bathtub?
The most common outcome is adhesion failure — usually presenting as peeling or delamination within the first year of service, often concentrated at flex points like the floor panel. In worse cases, a coating system with incompatible solvents can attack the acrylic substrate itself during application, causing crazing (a network of fine surface cracks) that is immediately visible and not repairable without significant additional work. Either outcome is a callback — and in the crazing scenario, a difficult and expensive one.
Why does coating adhesion vary between different bathroom substrates?
Surface energy, porosity, chemical compatibility, and mechanical profile all contribute to adhesion — and these variables differ significantly across cast iron, steel, fiberglass, acrylic, and cultured marble. Hard substrates like porcelain enamel provide excellent mechanical adhesion when properly profiled but require correct etch depth to achieve it. Flexible substrates like acrylic require coating flexibility to maintain adhesion through substrate movement. Chemically sensitive substrates like acrylic require solvent compatibility at the prep and application stage. Getting any of these factors wrong for the specific substrate produces an adhesion result that fails earlier than it should.
Are water-based coatings compatible with cast iron, steel, cultured marble, and acrylic surfaces?
Yes — WTR-Prime and WTR-Tek from Zen-Tek are formulated for compatibility across porcelain, fiberglass, acrylic, ceramic, cast iron, and laminate surfaces. Water-based systems are particularly well-suited for acrylic substrates because they eliminate the solvent compatibility concerns that make some solvent-borne products risky on acrylic. The prep requirements are the same as for solvent-borne systems — thorough cleaning, appropriate surface profiling, and correct primer adhesion — but water-based chemistry is generally more forgiving of the substrate sensitivities that make acrylic and cultured marble challenging.
Which surfaces require a bonding primer before refinishing?
All of them. Primer is not optional on any refinishing substrate — it's what creates the adhesion layer between the prepared substrate and the topcoat. A topcoat applied directly to a substrate, without primer, has only mechanical adhesion to the surface profile and will underperform in both adhesion and durability. The primer type varies — Prime-X for standard solvent-borne applications, WTR-Prime for water-based — but the requirement for primer doesn't vary by substrate.
Can acrylic and fiberglass tubs use the same refinishing system?
The same Zen-Tek primer and topcoat products can be used on both, but the prep protocols differ in meaningful ways. Acrylic requires more care with solvent selection during cleaning and degreasing, more controlled sanding (finer grit, lighter pressure), and particular attention to identifying the substrate accurately before applying any chemical prep products. Fiberglass gel coat is more chemically robust and tolerates more aggressive prep without risk to the substrate. The coating system itself — Prime-X and Synergy, or WTR-Prime and WTR-Tek — is appropriate for both, with substrate-appropriate prep.
What causes coating failure on cultured marble vanity tops and shower surrounds?
The most common causes are inadequate prep (particularly failure to address the smooth, low-porosity gel coat surface adequately before priming) and solvent penetration through micro-cracks in the gel coat that compromises adhesion at the substrate level. Cultured marble that has been cleaned with aggressive products over years sometimes has compromised gel coat that isn't obvious on inspection — these areas fail early even with otherwise good prep. A thorough inspection for micro-cracks, crazing, and gel coat damage before coating is especially important on cultured marble that shows its age.
How do thermal expansion and substrate movement affect coating performance?
All substrates expand and contract with temperature changes, but the rate varies significantly. Acrylic and fiberglass expand and contract more than metal substrates — in a bathroom that gets hot during a shower and cools to room temperature repeatedly over years, this differential movement stresses the coating at adhesion boundaries. A coating that lacks adequate flexibility to accommodate this movement — particularly at stress concentration points like tub corners and the joint between floor and wall — will develop cracks or delamination over time. This is why coating-substrate compatibility isn't just about initial adhesion; it's about whether the adhesion can survive the substrate's dynamic behavior in real-world use.
Which bathroom surfaces are most likely to experience peeling or delamination problems?
Acrylic surfaces have the highest delamination risk when the wrong system is used or prep is inadequate — the combination of solvent sensitivity, thermal movement, and flexibility creates multiple failure modes. Cultured marble is the next most challenging due to the variability in gel coat quality and the risk of solvent penetration through micro-cracks. Fiberglass and porcelain enamel surfaces on cast iron and steel are the most forgiving — properly prepped and primed, they hold coating reliably for years. The surfaces most likely to generate callbacks are the ones where substrate-specific prep requirements are most often underestimated.
Do older cast iron tubs require different preparation than newer steel tubs?
In some respects, yes. Older cast iron tubs with original porcelain enamel may have micro-cracks, chips, or worn enamel that require repair and leveling before priming. The enamel on older units is also often more porous at the surface than newer steel, which affects how the etch and primer application behave. Steel tubs, particularly newer units, have more uniform enamel but may have been previously refinished — in which case the condition of the existing coating needs to be assessed before deciding whether to recoat over it or strip with Zen-Strip and start fresh. The prep protocol is similar; the inspection and repair phase varies based on condition.
Can refinishing coatings be applied over previously refinished cast iron, steel, acrylic, or cultured marble surfaces?
Yes, with conditions. The existing coating must be firmly adhered — any peeling, lifting, or soft areas need to be addressed before recoating. If the existing coating is failing or of unknown chemistry, stripping with Zen-Strip and starting fresh produces more reliable results than trying to coat over an unstable foundation. If the existing coating is sound, a light scuff with appropriate grit, a thorough cleaning, and primer before topcoat is the standard approach. Never assume an existing coating is compatible with your system without verifying its condition and adhesion first.
How does substrate hardness affect coating durability and longevity?
Harder substrates — cast iron and steel with porcelain enamel — are more dimensionally stable and provide a more consistent platform for the coating to adhere to over time. They don't flex under use and don't expand and contract as dramatically as flexible substrates. The coating on a hard substrate has less mechanical stress to endure over its life. Softer or more flexible substrates — acrylic, fiberglass — put more demands on the coating's flexibility and adhesion strength simply because the substrate beneath them is moving. Everything else being equal, a properly done refinishing job on cast iron will outlast the same job on acrylic by a meaningful margin — not because the coating is different but because the substrate is more demanding.
What is the biggest mistake contractors make when refinishing mixed-material bathrooms?
Treating all substrates in the same bathroom as if they're the same material and applying the same prep protocol to all of them. A bathroom might have a cast iron tub, fiberglass shower surround, ceramic tile walls, and an acrylic countertop — four different substrates, each with its own prep requirements. The contractor who runs the same cleaning solvents, the same sanding grit, and the same primer protocol across all of them will get good results on some and failures on others. Take the time to identify each substrate individually and adjust your prep and product selection accordingly, even in the same room.
How do professional refinishers choose the right coating system for each bathroom surface?
The process is: identify the substrate accurately, confirm the existing surface condition (original or previously refinished, sound or failing), select the primer appropriate for that substrate and VOC requirements, select the topcoat appropriate for the application environment (solvent-borne, iso-free, or water-based), and execute the prep protocol appropriate for that specific substrate. Zen-Tek's product line provides a complete system for every substrate and every application environment — Prime-X and Synergy or Zenix for standard solvent-borne work; WTR-Prime and WTR-Tek for water-based requirements; AdvanEtch for chemical surface profiling; Zen-Strip for coating removal when needed. Using the right products for the right substrate, applied correctly, is the system that produces callback-free work.