The Masking Manual: Prevent Overspray From Ruining Your Day
Ventilation & Containment Systems
What gun cleaning solutions protect seals?
Professional HVLP spray systems with appropriate nozzle sizes can atomize thicker refinishing coatings effectively.
Not all cleaning solutions are safe for spray gun components.
Choose cleaning solutions that:
- Do not degrade seals
- Do not corrode internal passages
- Remove coating residue effectively
- Use nylon brushes and Zen-Strip Liquid for monthly thorough cleanings.
Regular maintenance prevents costly equipment replacement.
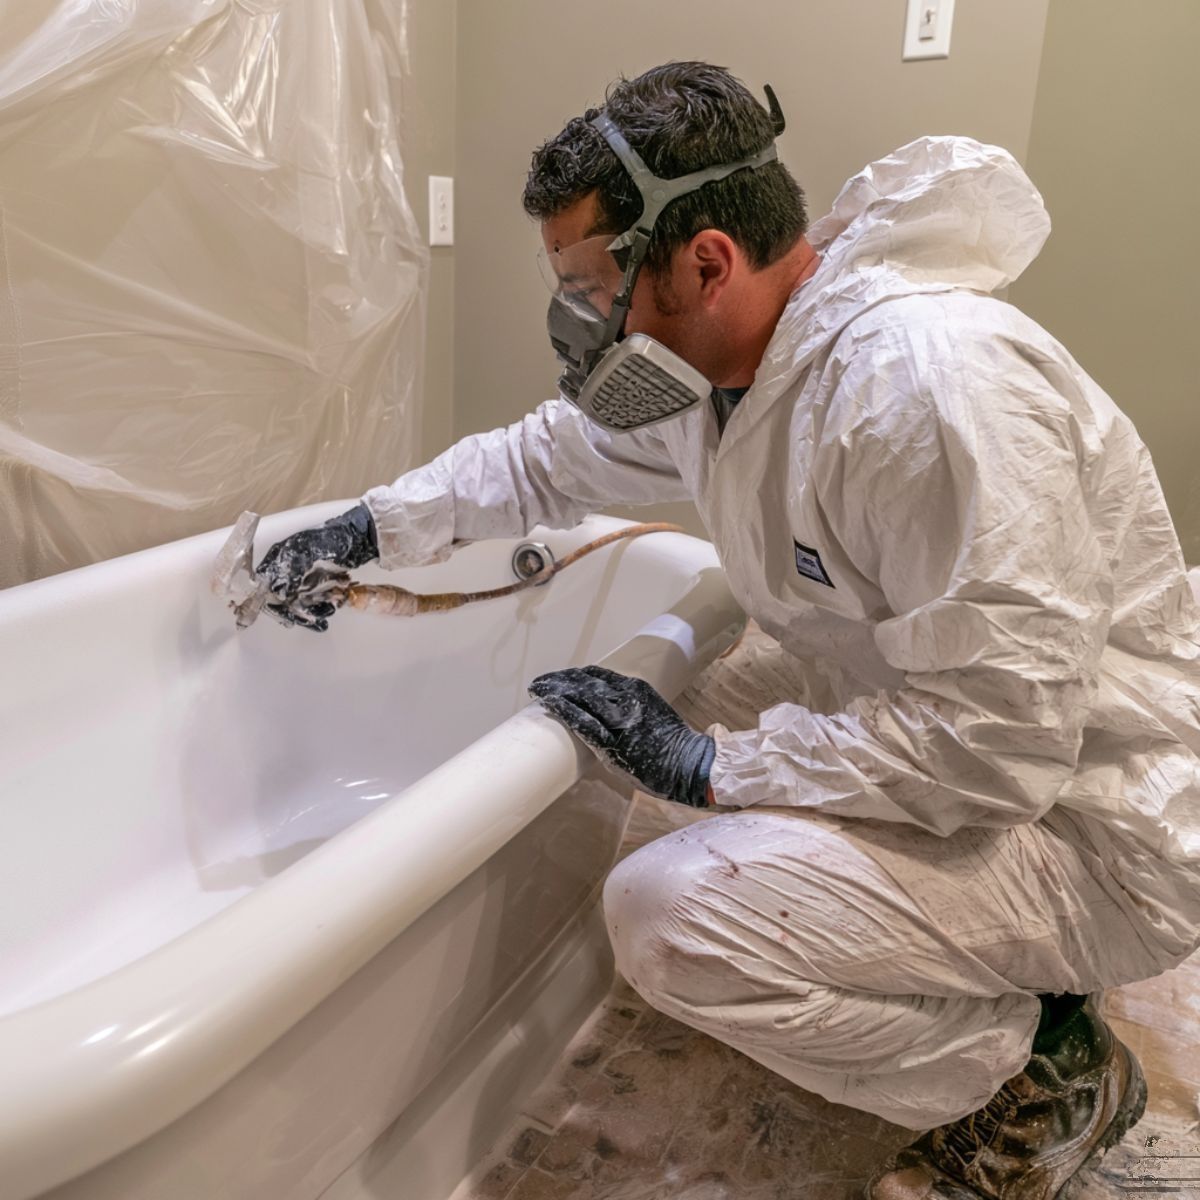
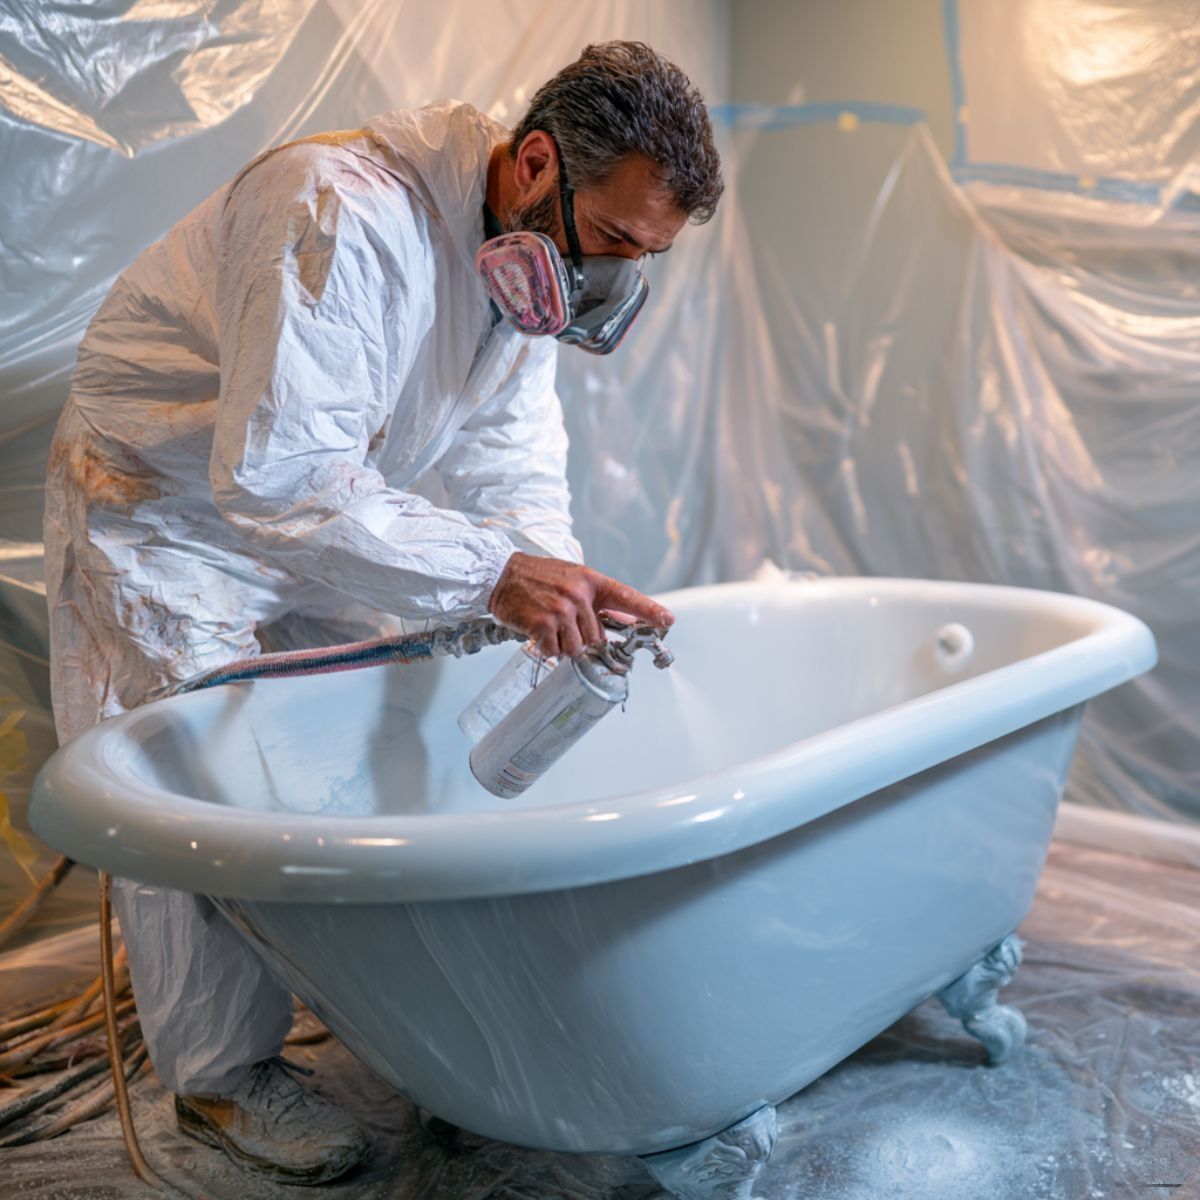
You've done the prep. The surface is etched, primed, and ready. Then you pull the trigger and a fine mist of topcoat settles on the chrome faucet, the mirror, the vinyl floor — everywhere it wasn't supposed to go. The job that was moving along just fine is now a cleanup problem, and cleanup on a refinishing site isn't always clean.
Overspray is one of those issues that experienced contractors learn to manage before it happens, not after. Good masking is the difference between a job that's done in four hours and one that turns into a six-hour ordeal with a razor blade and a frustrated client watching you scrub their mirror. This guide covers what actually works — materials, technique, sequencing, and the situations that catch even experienced refinishers off guard.
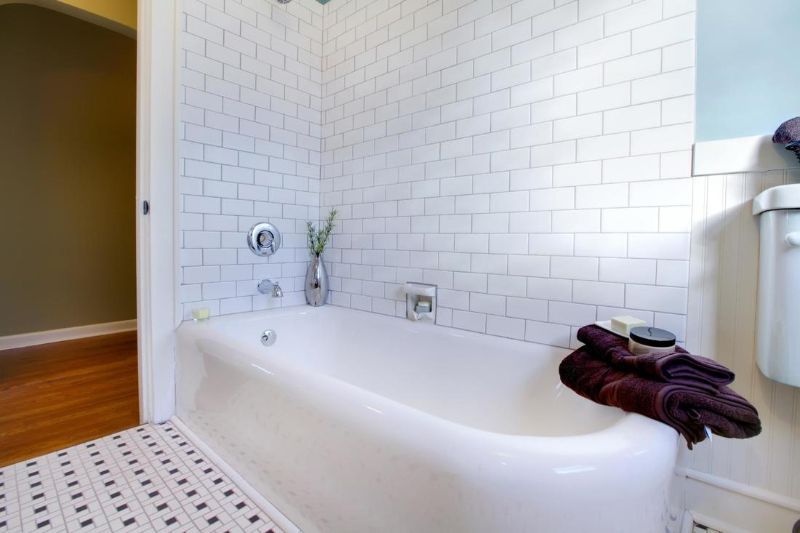
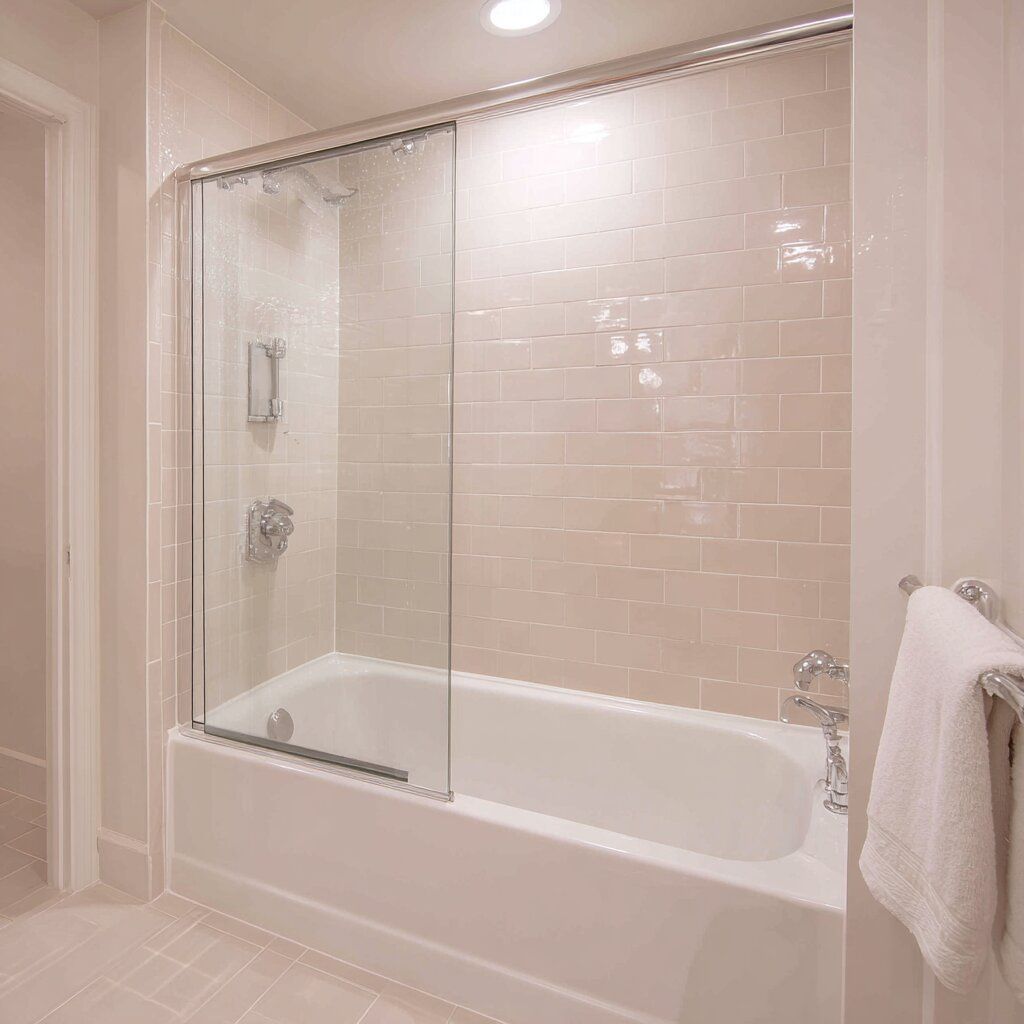
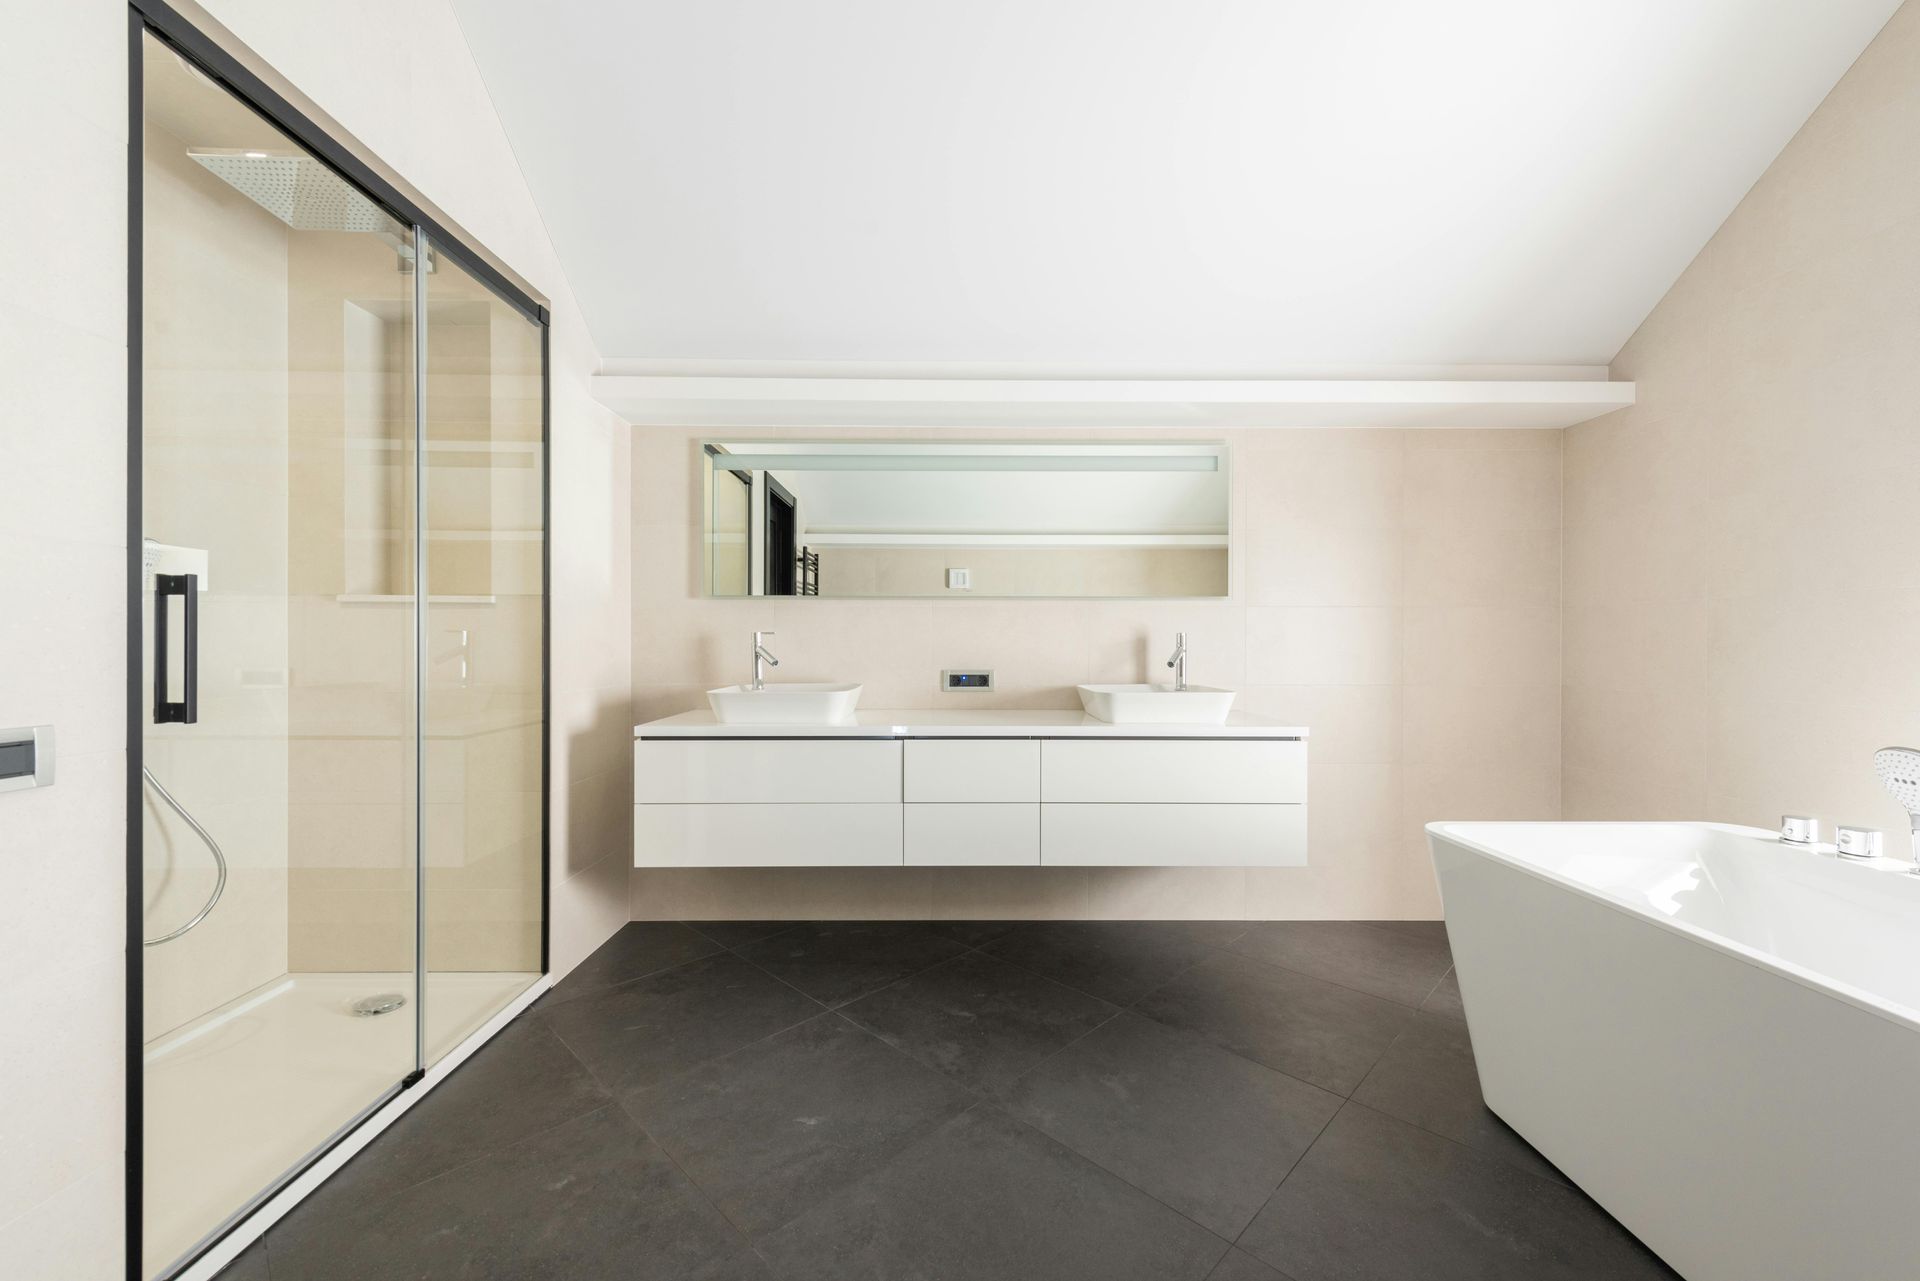
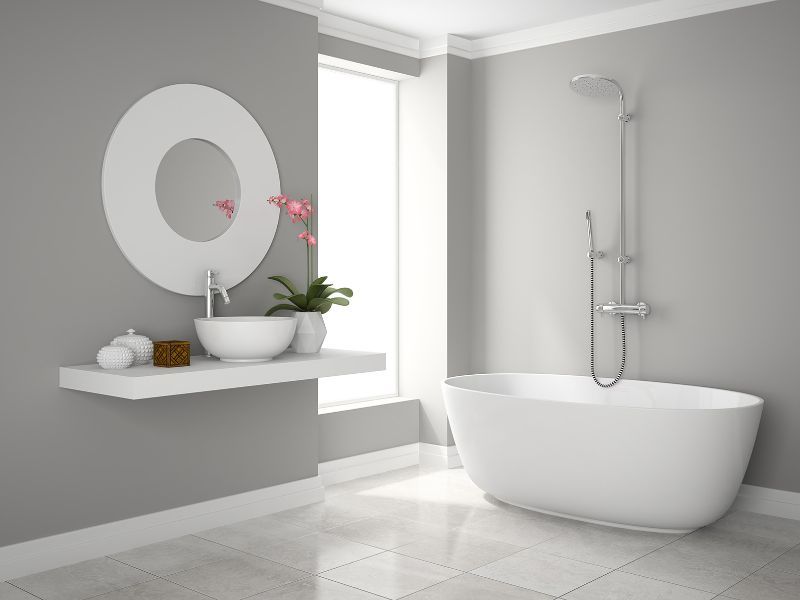
Why Overspray Is a Bigger Problem in Refinishing Than in Other Trades
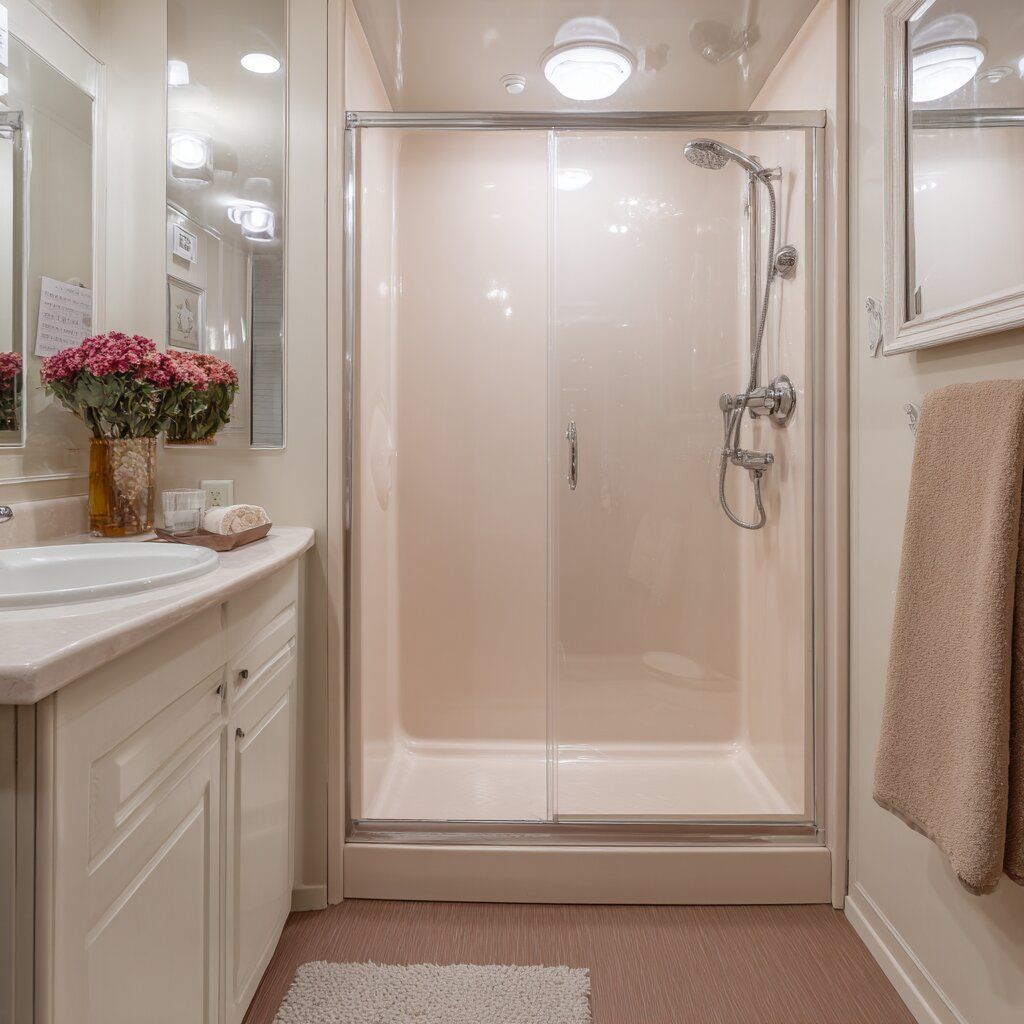
Painters working on open walls have room to breathe. Refinishers don't. Bathtubs, shower stalls, tile walls, countertops, and cabinet faces are almost always surrounded by surfaces that can't get coated — glass, chrome, grout, flooring, cabinetry, mirrors. The work zone is tight, the coating is fast-moving in aerosol form, and the surfaces around you are often glossy enough that even light overspray shows up immediately.
Add to that the fact that professional refinishing coatings are engineered to bond aggressively and cure hard. That's what makes them durable on the surfaces you're refinishing. It's also what makes overspray on the wrong surface a real problem to remove once it cures. Getting your masking right before you spray isn't a necessity — it protects the quality of your work and your reputation with the client.
Start With the Right Coating for the Job
This might seem like an odd place to start a masking guide, but your topcoat choice directly affects how much overspray you're managing. Self-leveling coatings with good flow characteristics produce less dry spray (overspray) than products that flash off quickly and hit nearby surfaces as semi-cured particles rather than a wet film.
Zen-Tek's Synergy polyurethane acrylic topcoat and Zenix iso-free 2K topcoat are both engineered for controlled application in the kind of tight, enclosed spaces refinishing contractors work in every day. When your coating behaves predictably, your masking job has to do less work. When you're fighting a product that atomizes poorly or flashes too fast, even solid masking won't save every surface.
Similarly, for water-based applications,
WTR-Tek offers exceptional control in confined spaces with a lower overspray profile than many solvent-borne systems. And
Cabinext — Zen-Tek's acrylic topcoat for cabinet and countertop refinishing — is formulated for application in kitchen environments where cabinetry, appliances, and hardware all need protection.
Masking Materials: What to Use and Where
Not all masking products perform the same way in a bathroom environment. Humidity, curved surfaces, glossy substrates, and the need to remove tape cleanly after a fast-curing topcoat all influence which materials you reach for.
Tape
The tape is your most critical masking component. In a bathroom, you're typically dealing with glossy tile, chrome fixtures, painted walls, and glass — surfaces that fall into two categories: ones where tape adhesion is a problem (glass, chrome) and ones where tape removal is a problem (freshly painted walls, woodwork).
For most refinishing applications, a medium-tack automotive-grade masking tape in the 36mm range is the workhorse. It seals cleanly against tile edges, holds on chrome and glass without lifting, and releases without pulling finish off adjacent surfaces if you remove it at the right time. Wider tape — 48mm or 72mm — is useful for protecting fixture edges and the perimeter of faucet bases where detail work matters.
In humid environments, tape adhesion degrades faster than you'd expect. Apply tape to dry surfaces only, even if you have to wipe down the area first. Tape applied to a surface with residual moisture from cleaning will lift within an hour and your seal is gone.
Masking Film and Plastic
Pre-taped masking film — the kind that dispenses with tape already bonded to one edge — is the fastest way to cover large vertical surfaces like tile walls, glass shower doors, and mirrors. It drapes cleanly, the tape edge gives you a precise line, and the film itself blocks overspray without the weight or moisture retention of paper.
Thin plastic sheeting (0.35 to 0.5 mil) works for large floor and fixture protection, but it shifts. Weight the edges with extra tape runs or use a heavier mil for floor coverage. Lightweight plastic on the floor of a bathroom moves when you step on it, exposes gaps, and becomes a slip hazard — both concerns matter on a live job site.
Static-cling masking film is worth having in your kit for glossy vertical surfaces like mirrors and glass panels where tape adhesion can leave residue. The static holds it flat, it doesn't require adhesive, and it peels off cleanly. It's not a replacement for taped film on spray-zone perimeters, but for large glass surfaces behind your work zone, it's faster and cleaner than taping a sheet of plastic to a mirror.
Masking Paper
Brown kraft masking paper has its place — primarily on floors and countertop surfaces adjacent to the work zone where you need tear resistance and some rigidity. It's less prone to blowing around from gun pressure than thin plastic and it absorbs any drips rather than letting them pool. The downside is that paper won't conform to curved surfaces the way plastic will, so for anything with compound curves, film is the better call.
Room Masking: A Zone-by-Zone Approach
Trying to mask a bathroom in whatever order feels natural wastes time and leaves gaps. Working by zone — floor, fixtures, walls, glass, then the immediate spray perimeter — lets you build complete protection systematically without doubling back.
Floor Protection
Cover the entire floor before you do anything else. Overspray settles down, and atomized coating particles that escape your spray zone will eventually land on the floor if they land anywhere. Use plastic sheeting weighted at the edges with tape, or a combination of masking paper against the tub or tile base and plastic across the rest of the floor. Don't forget the threshold and any transition to adjacent flooring — a gap at the door lets coating particles travel further than you'd think.
Fixture Masking
Drains, overflow covers, faucet handles, spouts, and showerheads all need individual masking. For drains, a fitted foam plug or a piece of plastic and tape works well — the goal is preventing coating from getting into the drain body where it can cause problems later. For faucets and handles, wrap the fixture with plastic and secure the tape at the base, not on the chrome itself, to avoid adhesive residue on polished surfaces.
Toilet masking gets skipped more than it should. Even if the toilet is across the room from the tub, overspray travels. A fitted toilet cover or plastic sheeting draped and taped at the base takes two minutes and saves a cleanup headache.
Wall and Glass Protection
Adjacent tile walls that aren't being refinished need tape at the boundary edge and either masking film or plastic over the surface if they're within the spray zone. For shower glass — panels, doors, fixed glass walls — static-cling film or taped plastic are both good options. Tape every seam; a gap the width of a pen line is enough for overspray to find its way through.
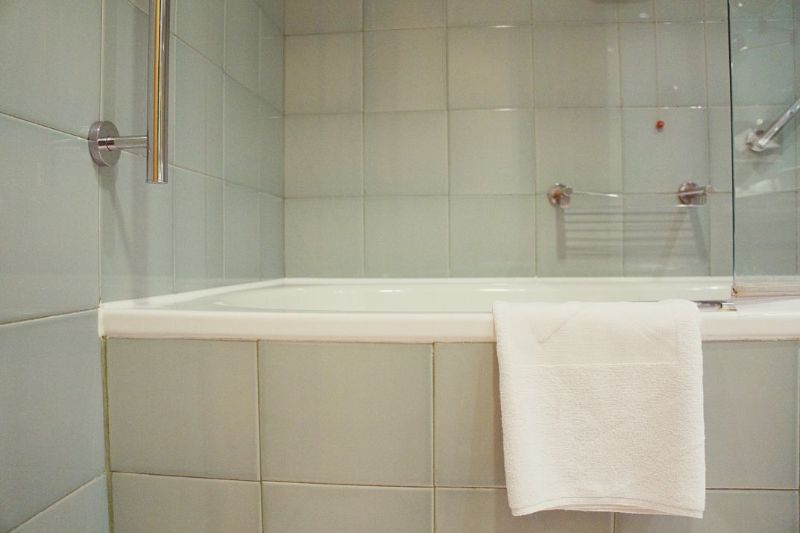
Mirrors require careful tape placement on the frame edge rather than the glass surface itself. Mirror backing is sensitive to solvents, and while the front glass can handle most tape products without residue issues, the frame edge is where adhesive tends to leave marks if tape sits too long.
The Spray Perimeter
The final step before you spray is the detail masking directly adjacent to your work surface. This is where you use your best tape — the precise, clean-line masking that defines where the coating starts and the surrounding surface ends. Take your time here. A tape line that wanders or lifts gives you a ragged edge that's much harder to fix than overspray on a mirror.
Spray Technique That Works With Your Masking
Good masking and sloppy technique are still going to produce overspray problems. The two work together.
Gun distance and fan pattern matter more in tight spaces. In an open area you can stand back and use a wider fan. In a 5x8 bathroom or a fiberglass shower insert, your options are more constrained. Keep your gun at 8 to 10 inches from the surface and tighten your fan pattern to match the width you're working with. A wide fan in a narrow shower stall bounces overspray off the opposite wall.
Reduce your material pressure first, not your fan. When you're fighting overspray in a small space, the instinct is to reduce the fan width, which concentrates the spray but can create runs. Try reducing fluid pressure first — you want enough atomization for good flow but not so much that you're creating a fog.
HVLP is your friend in enclosed spaces. High-volume low-pressure spray guns transfer more material to the surface and produce less bounceback overspray than conventional or airless systems. In a tight bathroom, the difference in airborne particle count between a well-tuned HVLP and an airless gun is significant. If you're doing a lot of tub and tile refinishing in smaller spaces, HVLP is worth the investment if you haven't already made it.
Spray away from masked edges, not into them. Start your gun stroke before the surface begins and end it after. This keeps the heaviest material deposit in the middle of your work zone rather than piling up at the edge against your tape line.
Vent the space, but control airflow direction. A box fan in a doorway or window creates exhaust pressure that pulls overspray particles toward the exit rather than letting them settle on surfaces. Position it so air moves through the space past you and out, not across your spray path where it redirects particles onto adjacent surfaces.
Sequencing: What Order to Mask and Spray
On multi-surface jobs — a bathroom where you're doing the tub, tile walls, and countertop in the same visit — sequencing affects both efficiency and overspray risk.
Generally, work top-down and far-to-near. Spray the highest surfaces first so any overspray that drifts down lands on surfaces you haven't finished yet. Countertops before floors, tile walls before the tub deck, upper tile before lower tile. Mask what's finished; spray what's next.
On cabinet refinishing jobs in kitchens or bathrooms, remove doors and drawer fronts if possible and spray them flat off-site or in a controlled area. What you can't remove — box faces, inside frames — gets sprayed in place with everything adjacent masked. Zen-Tek's cabinet coating is designed for exactly this scenario: in-place application on surfaces surrounded by things that can't get coated.
Do your caulking before you mask for spray. Fresh caulk needs time to skin over before tape goes on top of it, and you don't want to be taping over wet caulk. Lay your caulk lines, let them set, then proceed with your masking sequence.
Removing Masking Without Damaging the Finish
Pull tape while the coating is still in its initial cure window — not wet, but not fully hard either. Most professional refinishing topcoats have a window between initial set and full cure where the film is firm enough not to smear but flexible enough that tape removal won't cause chipping or edge lifting. Check the technical data sheet for the product you're using; that window varies.
Pull at a low angle — 45 degrees or less — back over itself rather than away from the surface. This shears the tape edge cleanly rather than lifting it, which reduces the risk of pulling coating up with the tape on freshly refinished surfaces nearby.
Don't leave masking in place overnight if you can help it. Tape adhesive that's been in contact with a surface for 12+ hours in a warm, humid bathroom can leave residue or, in the worst case, bond well enough to the substrate that removal becomes a problem.
Cleanup: When Overspray Happens Anyway
Even on a well-masked job, particles find their way somewhere they weren't supposed to go. How you handle it matters.
On glass: A single-edge razor blade held at a low angle on wet glass will take off fresh overspray without scratching, provided the glass is wet. Don't dry-scrape. For cured overspray, a citrus-based solvent applied with a soft cloth will soften most coating types enough to wipe off without abrasive tools.
On chrome: Fresh overspray on chrome wipes off easily with a solvent-dampened cloth while it's still wet. Cured overspray on chrome is trickier — a plastic scraper and solvent, applied carefully, avoids scratching the plating.
On vinyl flooring or painted trim: Solvent contact time matters here. Work quickly, use minimal solvent, and blot rather than wipe to avoid spreading the overspray into the substrate. If coating has fully cured on vinyl flooring, careful mechanical removal with a plastic tool followed by solvent cleanup is usually the safest approach.
The honest answer: some overspray situations require professional cleanup tools and real time. The best version of overspray management is not producing it in the first place. If you're consistently dealing with overspray on the back end of jobs, the issue is somewhere in your masking or technique setup — not bad luck.
Frequently Asked Questions About Overspray Prevention and Masking
How do I stop overspray from landing on nearby tile, walls, or glass?
The most reliable approach is physical barrier masking — taped film or plastic sheeting that covers every surface within the spray zone that isn't being coated. For surfaces just outside the direct spray zone, static-cling masking film on glass and mirrors handles a lot of the risk without requiring tape on sensitive surfaces. Beyond masking, reducing gun pressure, shortening the fan pattern, and positioning a ventilation fan to exhaust air away from finished surfaces all help keep overspray contained.
What's the best masking material for stopping overspray on vertical surfaces?
Pre-taped masking film is the most efficient option for large vertical surfaces — the tape edge is already bonded to the film so you get a sealed perimeter in one step. For smaller vertical areas like tile borders and trim edges, medium-tack automotive masking tape with kraft paper or plastic backed off it covers the adjacent surface. On glossy vertical surfaces like mirrors and glass shower panels, static-cling film eliminates the adhesive residue concern entirely.
How far should I keep my gun from the surface to avoid overspray?
What's the ideal fan pattern and pressure setting to minimize overspray in small spaces?
Tighten the fan pattern before you reduce fluid pressure. A wide fan in a small enclosure bounces particles off adjacent surfaces; a narrower fan keeps material moving in the direction you intend. From there, reduce fluid pressure to the minimum that still gives you good atomization and flow — you want the material to land wet, not as dry particles. Dial in your settings on a test surface before you start, especially when working in an unusually small or enclosed space.
Should I reduce my material or adjust the spray tip to control overspray?
Both are valid adjustments. A smaller tip orifice reduces output volume and can help with overspray control in tight spaces, but it also changes the flow rate, which affects how you move the gun. Reducing material pressure is often the faster adjustment and has a more immediate effect on overspray volume. If you're consistently fighting overspray in small spaces with a particular coating, dropping to a slightly smaller tip size is worth testing — just confirm it's still producing adequate atomization with the material you're using.
How do I spray inside a small bathroom without fogging the whole room?
Ventilation is the primary answer. A box fan positioned to create negative pressure — exhausting air out through a window or door — pulls atomized particles toward the exit rather than letting them accumulate in the air. Combine that with a tightened fan pattern, reduced pressure, and spraying in passes that move material toward the exhaust source rather than across it. In very small spaces like a 32-inch shower insert, consider whether a smaller HVLP gun or even a detail gun gives you better control than a full-size production gun.
What type of sprayer creates the least overspray for refinishing? (HVLP vs. airless)
HVLP wins for enclosed refinishing work. High-volume low-pressure guns operate at lower atomization pressures than conventional or airless systems, which means less rebound off the surface and fewer particles becoming airborne. A well-tuned HVLP gun transfers 65–70% or more of your material to the surface; a conventional gun can be significantly lower. Airless systems are fast for large open areas but produce substantial overspray in tight spaces — they're generally not the right tool for a 5x8 bathroom.
How do I prevent overspray from settling on freshly sprayed areas?
Sequencing is the main answer — work top-down so any drift from upper surfaces settles on areas you haven't finished yet. Beyond that, keep your ventilation moving air toward an exit rather than circulating it across finished surfaces. If you're doing multiple coats, let each coat reach initial set before continuing work in the space, so any incidental overspray from adjacent areas lands on a film that's firm enough to resist it.
Is there a way to vent overspray properly in an occupied apartment or condo?
In occupied multi-unit buildings, overspray control is partly a ventilation problem and partly a containment problem. Use a box fan in the bathroom window or doorway to create exhaust pressure. Seal the gap at the bottom of the bathroom door with a towel or masking paper to prevent vapors and particles from traveling into the unit. Work in the early morning before occupants are active if possible, and choose coating systems with lower overspray profiles — water-based coatings like
WTR-Tek or iso-free systems like
Zenix produce less airborne solvent load than traditional solvent-borne urethanes, which matters in occupied spaces.
What's the best tape that won't peel paint or coating when removed?
Medium-tack automotive or general-purpose masking tape in the 36–48mm range is the standard for most refinishing applications. The key is removal timing — tape that's been in place for more than a few hours in a warm bathroom increases its bond to the substrate and the risk of lifting finish when removed. Pull tape while the coating is in its initial cure window, at a low angle, slowly. Avoid using high-tack tape (the blue or green "sharp line" painter's tape) directly against freshly refinished surfaces — it's designed for clean lines on porous painted walls, not for removal from cured refinishing coatings
What masking plastic or paper clings best to curved or glossy surfaces like tubs?
Thin plastic film (0.35 mil) conforms to curves better than paper, which wants to hold its flat shape. For the interior of a tub or the curved deck around a faucet, plastic film pressed into the curve and taped at the perimeter hugs the shape well enough to prevent bleed-through. On highly glossy surfaces, tape adhesion can be an issue — clean the surface thoroughly before applying tape, and use a tape specifically designed for low-adhesion substrates if you're working on polished acrylic or fiberglass that you don't want to mark.
Can I use masking film with built-in static cling for vertical walls?
Yes, with a caveat. Static-cling film works best on smooth, non-porous surfaces — glass, polished tile, mirrors. On textured tile, painted drywall, or any surface with significant profile, static cling won't maintain contact and the film will sag or pull away from the wall. For those surfaces, pre-taped masking film with a physical adhesive edge is more reliable.
Is it better to mask floor-to-ceiling or just around the spray zone?
For most bathroom refinishing work, floor-to-ceiling masking is worth the extra five minutes. Overspray particles are lighter than air and travel further than intuition suggests, especially with any airflow in the space. Masking only the immediate spray zone leaves the upper walls and ceiling vulnerable to fine mist that settles slowly over time. If you're doing a single tub in a larger bathroom and can manage your gun technique tightly, zone masking may be sufficient — but when in doubt, covering more surface takes less time than cleaning it.
How do I mask fixtures like drains, faucets, and overflow covers cleanly?
Drains get a fitted foam plug or a plastic-wrapped paper insert taped with automotive tape. Don't just drop plastic in the drain — it can shift. For faucet bodies and spouts, wrap with plastic film and tape at the base where the fixture meets the tub deck or wall, keeping tape off polished chrome where possible. Overflow covers can be taped directly or removed entirely if the job scope allows — removal gives you cleaner access to the surrounding tub surface and eliminates the masking step entirely
What's the best way to mask around toilets, vanities, or built-in cabinetry?
For toilets, a fitted plastic cover or a plastic sheet draped over the tank and bowl, taped at the base to the floor masking, is the standard approach. For vanities and built-in cabinetry, mask the faces with plastic film and tape at the frame edges — pay particular attention to any gap between the cabinet and the wall or floor where overspray can travel behind the masking. If you're refinishing cabinet faces with a product like
Cabinext, mask the surrounding walls and countertop surfaces first, leaving only the cabinet faces exposed.
How can I mask a bathroom quickly without compromising protection?
A systematic sequence is faster than an improvised one. Start with floor coverage (one continuous sheet, taped at the perimeter), then do fixture masking (drain, toilet, faucet), then wall and glass protection (pre-taped film moves quickly on large surfaces), then the detail perimeter tape directly adjacent to your work surface. Most bathroom masking jobs can be completed in 20 to 30 minutes with a complete kit laid out and a practiced sequence. Pre-cut your plastic to room-approximate sizes before you arrive on a multi-job day — it saves time on every stop.
Do you mask before or after caulking?
Always caulk first, then mask. Fresh caulk needs time to skin before tape contacts it — applying tape over uncured caulk pulls it when you remove the tape and ruins the bead. Lay your caulk lines, give them adequate skin time per the product instructions, then proceed with masking for spray.
How do I mask textured tile or uneven surfaces without gaps?
Textured tile is one of the hardest masking situations. Standard tape won't seal to a heavy texture profile, which means overspray can creep under the tape edge. For heavily textured tile, use a flexible masking tape with some conformability — press it firmly into the texture rather than just laying it across the surface. A fingernail or the edge of a plastic scraper run along the tape after application helps seat it into the texture profile. In areas where you genuinely can't get a sealed edge against texture, back the tape with a strip of foam weatherstrip to fill the gap.
"Double taping" means applying the first layer of tape 3/16 of an inch away from where you want your final line, then retaping that area exactly where you want it. That way, if there is any seepage, it will not go past the second tape. This is especially helpful when working on dark or textured tile.
Can I reuse masking materials for multi-day or multi-room jobs?
Tape: no. Tape that's been applied and removed has compromised adhesive and won't seal reliably on a second use — it's also often coated in dust and debris picked up on removal. Plastic sheeting and masking film in good condition can be reused if it wasn't contaminated with overspray and the tape edge is still functional. In practice, the cost of fresh tape and film per job is low enough that reusing compromised materials to save a few dollars is a bad trade against the risk of a masking failure.
What's the fastest way to mask a shower stall with multiple glass panels?
Pre-taped masking film, handled by two people when possible. One person holds the film roll and manages the drop, the other guides and seats the tape edge against the frame. Work panel by panel from the top down, overlapping film at corners rather than trying to fit a single piece to the entire enclosure. For fixed glass panels, static-cling film can speed things up significantly — no tape application needed on the glass surface itself, just cover and smooth.
What do I do if overspray lands on unmasked surfaces like chrome or mirrors?
Act fast. Fresh overspray on chrome and glass comes off easily with a solvent-dampened cloth while it's still wet — keep a rag and appropriate solvent within reach during spray so you can address it immediately. Once overspray has cured, removal becomes much harder and more time-consuming. On chrome, avoid abrasive tools — a plastic scraper and solvent will handle most cured overspray without scratching plating. On glass, a wet razor blade at a low angle works for cured overspray.
How do I remove overspray from glass without scratching it?
Wet the glass surface first using a wet sponge, then use a single-edge razor blade held at approximately 30 degrees to the glass. The water lubricates the blade and prevents scratching. Keep the blade flat — any rocking onto the corner of the blade will scratch. Work in one direction rather than back-and-forth. For overspray that's partially cured and won't blade off cleanly, a citrus-based solvent or lacquer thinner on a soft cloth can soften the film enough to wipe without mechanical abrasion. Test solvents in an inconspicuous area first on coated glass.
Will overspray damage finished wood trim or vinyl flooring if it's not masked well?
Yes — both are vulnerable. Solvent-borne refinishing coatings will soften and stain unsealed wood trim, and the solvent in the coating can cause vinyl flooring to swell or discolor if it contacts the surface in quantity. Even light overspray on unsealed wood, if left to cure, bonds to the grain and requires aggressive removal. Mask wood trim with tape at the edge and paper or plastic across the face; cover vinyl flooring completely before you spray.
Should I use liquid masking products for hard-to-tape areas?
Liquid masking — applied by brush or roller and peeled off after spray — is useful in specific situations: irregular surfaces that tape won't conform to, areas with complex geometry, or substrates where tape adhesion is unpredictable. It's slower to apply than tape and film and needs adequate dry time before you spray, so it's not a substitute for your primary masking setup. In refinishing work, the most common good use case is masking grout lines around tile that's being refinished, where tape won't seal to the textured grout surface reliably.
Is painter's plastic better than paper for stopping bleed-through or flaking?
Plastic is better for bleed-through prevention — solvent-borne coatings will wick through kraft paper if the overspray is heavy or if there's direct contact. Plastic is impermeable. Paper has the advantage of tear resistance and rigidity, which makes it easier to handle and less prone to shifting. For most refinishing applications, plastic for large coverage and paper as a secondary layer in high-impact areas (like directly under the spray zone) gives you the benefits of both.
What masking tape holds best in humid bathrooms?
Tape applied to a dry, clean surface in a humid bathroom will hold adequately for a single job day. The issue is surface moisture at application — tape stuck to a damp surface fails. Before you apply tape in a bathroom where cleaning has been done recently or where there's residual humidity from the previous occupant, wipe surfaces dry and let them air out briefly. Acrylic-backed masking tapes generally hold humidity better than rubber-backed versions, and some automotive masking tapes are specifically formulated for high-humidity environments.
How long can I leave masking in place without adhesive residue?
The shorter, the better. Most masking tape products are safe for 24 to 48 hours in normal conditions without leaving residue, but heat and humidity in a bathroom compress that window. In a warm bathroom in summer, tape left overnight can begin to leave adhesive. Aim to pull masking the same day, ideally within the cure window of your topcoat as described above. If you have to leave tape overnight — on a multi-day job where you're returning to a room — use a low-tack masking product for anything sitting directly against finished surfaces.
What's your go-to masking setup for tubs and tile refinishing?
For a standard tub-and-tile bathroom: continuous floor coverage in plastic sheeting, pre-taped masking film on the mirror and any large glass surfaces, automotive medium-tack tape at all fixture perimeters and the spray boundary edges, and individual fixture masking for drain, faucet, and overflow. Total kit weight is minimal, setup takes 20 to 25 minutes, and teardown is faster than setup. The one addition that pays for itself quickly is a quality tape dispenser with a tension brake — it makes single-person masking significantly faster than fighting rolls of tape freehand.
Is it worth investing in masking dispensers or pre-taped film systems?
Yes, especially if you're doing volume. A masking machine that dispenses tape and paper together in a single pass cuts masking time significantly on repetitive jobs. Pre-taped film systems — rolls of plastic film with tape already bonded to one edge — eliminate one of the most time-consuming steps (taping the edge of a separate piece of plastic to the wall). For a contractor doing multiple refinishing jobs per week, the time savings across a month of jobs easily justifies the equipment cost. For lower-volume operations, pre-taped film rolls from a paint supply source are a good middle ground — cheaper than a dispensing machine, faster than building tape-and-film setups by hand.